Selecting a dummy security camera involves matching needs with options, considering wireless/wired models and eco-friendly solar-powered alternatives. Using the Dummy Camera Bracket Installation Guide, mount cameras in sunny locations, align solar panels for optimal energy capture, and secure connections for uninterrupted power. Test field of view, lighting sensitivity, and night vision to ensure comprehensive, reliable security monitoring.
“Elevate your home security with solar-powered dummy security cameras—a sustainable, cost-effective solution. This comprehensive guide offers a detailed look at selecting the ideal dummy camera for your setup, mastering solar panel installation basics, and ensuring optimal performance through mounting, wiring, and testing. Discover expert tips on dummy camera bracket installation for a secure, eco-friendly surveillance system that blends seamlessly with your environment. Enhance your property’s safety and aesthetics with this reliable, renewable technology.”
- Choosing the Right Dummy Camera for Your Setup
- Understanding Solar Panel Installation Basics
- Mounting the Camera: A Step-by-Step Process
- Wiring and Connecting to Power Source
- Testing and Optimizing Performance
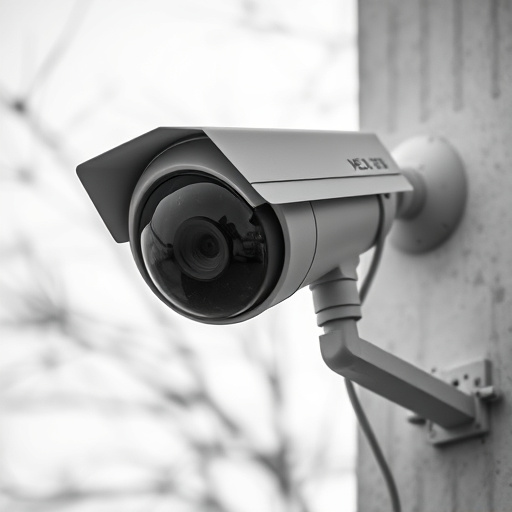
Choosing the Right Dummy Camera for Your Setup
Selecting the ideal dummy security camera involves considering your specific setup and requirements. One key aspect is understanding the different types available, such as wireless or wired options, to align with your power source preferences. Solar-powered models are an eco-friendly choice, offering flexibility in remote areas or where traditional wiring is challenging.
When choosing, refer to a Dummy Camera Bracket Installation Guide for insights into compatibility and placement. Ensure the camera’s design suits your environment—whether it blends seamlessly into outdoor landscapes or requires distinctive markings for realistic effect. Prioritize features like motion detection, night vision, and app connectivity for enhanced security monitoring.
Understanding Solar Panel Installation Basics
Solar-powered dummy security cameras are an eco-friendly and cost-effective solution for home or business surveillance. Understanding solar panel installation is crucial when setting up these devices. The process begins with selecting a suitable location, typically an area that receives ample sunlight. This could be a roof or even a sunny window sill. Once chosen, the solar panel needs to be securely mounted using a dummy camera bracket—an essential component for stable and efficient energy generation.
The Dummy Camera Bracket Installation Guide will walk you through the steps of ensuring optimal sun exposure and aligning the panel at the correct angle. Proper installation maximizes solar energy capture, enhancing the camera’s performance and battery life. It involves careful consideration of factors like roof pitch, shading, and local climate to guarantee a seamless integration of your solar-powered dummy security system.
Mounting the Camera: A Step-by-Step Process
Mounting a solar-powered dummy security camera involves a straightforward process guided by a dummy camera bracket installation guide. Begin by identifying the ideal location, ensuring it receives ample sunlight for optimal charging. Next, gather your tools: the camera, bracket, screws, and a level to ensure proper alignment. Position the bracket at eye level or slightly elevated, securing it firmly to a sturdy surface like a pole or wall using the provided hardware.
Follow the guide’s instructions to attach the camera to the bracket, ensuring the connections are secure. Once in place, verify that the camera captures clear footage and that the solar panel faces directly towards the sun. With proper mounting, your solar-powered dummy security camera will provide reliable surveillance, harnessing the power of the sun for continuous operation.
Wiring and Connecting to Power Source
When installing a solar-powered dummy security camera, understanding how to wire and connect it to a power source is crucial for its efficient operation. The process begins with carefully positioning the camera within reach of direct sunlight using the provided Dummy Camera Bracket Installation Guide. Ensure the bracket allows for optimal sun exposure, aligning the solar panel facing south (or according to your region’s equivalent).
Once placed, you’ll connect the camera’s wiring to a suitable power source. This typically involves plugging in the included solar charger or adapter into a nearby electrical outlet and connecting it to the camera’s battery compartment. The guide will detail the specific steps for this process, ensuring a secure connection that facilitates smooth energy transfer from the charger to the camera’s batteries, readying it to capture footage day or night without interruption.
Testing and Optimizing Performance
Testing and optimizing performance is a crucial step in getting the most out of your solar-powered dummy security cameras. Once you’ve installed your dummy camera bracket, it’s time to fine-tune its capabilities. Start by evaluating the camera’s field of view—ensuring it covers the desired area effectively. Adjust the angle and positioning for optimal sightlines, capturing key points while avoiding blind spots.
Next, assess the camera’s sensitivity in various lighting conditions. These security cameras are designed for solar power, so test their performance during different times of day and year. Adjust settings for infrared (IR) illumination if needed, ensuring clear night-time visibility. Regular testing and adjustments will guarantee your dummy camera maintains peak performance, providing reliable security monitoring.
Solar-powered dummy security cameras offer a sustainable and cost-effective solution for enhancing home security. By following this installation guide, including choosing the right camera, understanding solar panel basics, mounting, wiring, and optimizing performance, you can easily set up a reliable, eco-friendly surveillance system. Implement a Dummy Camera Bracket Installation Guide to ensure your camera is securely mounted and optimized for maximum sunlight exposure, providing peace of mind and enhanced security for your property.