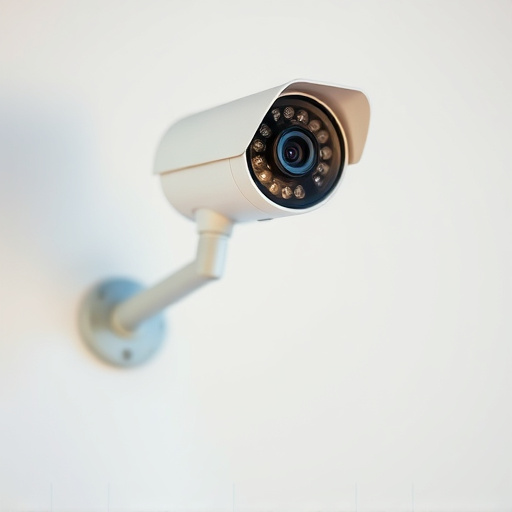
Dummy dome cameras offer an affordable, easy-to-install security solution with a realistic design and blinking LEDs for active surveillance. The included Dummy Camera Bracket Installation Guide ensures simple deployment, allowing strategic placement for maximum deterrence. To maximize effectiveness, follow these guidelines: properly install the bracket, test LED functionality regularly, maintain a clean lens, adjust blink intervals, and monitor power sources.
“Uncover the power of dummy dome cameras with blinking LEDs, a smart security upgrade for any home or business. This comprehensive guide delves into the benefits of these unassuming yet effective devices. From enhancing security to adding a layer of protection, dummy dome cameras offer peace of mind. We provide a detailed Dummy Camera Bracket Installation Guide, making it easy to set up and ensure optimal performance. Learn tips for maintaining the blinking LED features, ensuring your system remains both functional and visually deterring.”
- Understanding Dummy Dome Cameras and Their Benefits
- Step-by-Step Guide to Installing Dummy Camera Brackets
- Tips for Effective Use and Maintenance of Blinking LED Features
Understanding Dummy Dome Cameras and Their Benefits
Dummy dome cameras, also known as mock or fake security cameras, are an innovative and cost-effective solution for enhancing home or business security. These devices are designed to look like real surveillance cameras but serve as a deterrent without the need for complex installation processes. Understanding how these dummy cameras work is the first step in securing your space effectively. By simply placing them at strategic locations, you can create the illusion of a fully functional security system, often with blinking LEDs that mimic real camera activity.
One of the key advantages of dummy dome cameras is their ease of installation, made possible by a standard Dummy Camera Bracket Installation Guide. This simple process allows homeowners and business owners to quickly deploy these devices without professional help. The brackets are designed to fit various mounting surfaces, ensuring flexibility in placement. Additionally, these cameras offer peace of mind by deterring potential intruders, as the visible presence of surveillance equipment can significantly reduce crime rates.
Step-by-Step Guide to Installing Dummy Camera Brackets
Installing a dummy camera bracket is a straightforward process, serving as a practical step in securing your dummy dome cameras for enhanced security. Here’s a detailed Dummy Camera Bracket Installation Guide to ensure a smooth setup.
1. Preparation: Begin by gathering all necessary tools and materials—this typically includes your dummy camera bracket, screws, a screwdriver, and sometimes adhesive or nail sets depending on the mounting surface. Choose a location that offers optimal visibility and accessibility for your security camera.
2. Marking the Position: Using a pencil, carefully mark where you want to attach the bracket. Ensure it aligns with your camera’s field of view for maximum effectiveness. Marking the spots will make drilling or nailing easier later on.
3. Mounting: If using screws, drill pilot holes at the marked positions to prevent cracking. Attach the bracket securely by screwing it in place. For adhesive or nail sets, follow the manufacturer’s instructions for optimal bonding strength. Ensure the bracket is level and secure before proceeding.
4. Camera Attachment: Once the bracket is firmly in place, attach your dummy camera, ensuring it’s snug and aligned correctly. Double-check that the camera’s LED blinking function operates as expected after installation.
Tips for Effective Use and Maintenance of Blinking LED Features
To make the most out of your dummy dome camera with a blinking LED feature, follow these tips for effective use and maintenance. Start by ensuring proper Dummy Camera Bracket Installation Guide to secure the camera in a strategic location where it can capture clear footage while the blinking LED is visible. Regularly test the LED functionality to confirm it’s working correctly, as this adds a layer of security by deterring potential intruders. Keep the camera lens clean and free from debris using soft cloths or air compression to maintain optimal visibility.
Additionally, consider adjusting the LED blinking interval based on your environment and security needs. A well-timed blink can attract attention during suspicious activities, while a more subtle pattern might blend into the background without alarming innocent bystanders. Regular maintenance also includes checking the camera’s power source and battery life, ensuring they’re adequately charged or connected to a reliable power supply for uninterrupted surveillance.
Dummy dome cameras with blinking LEDs offer a cost-effective security solution, enhancing visibility and deterring potential intruders. By following our comprehensive Dummy Camera Bracket Installation Guide and implementing effective maintenance tips, you can maximize these camera’s benefits. With the right setup and care, these devices become valuable assets in securing your premises, providing peace of mind in today’s digital era.