Dummy dome cameras with LED indicators offer an affordable and effective security solution for homes and businesses. The Dummy Camera Bracket Installation Guide provides a step-by-step process for DIY enthusiasts to securely install these brackets, enhancing property security. By strategically placing cameras at entry points, windows, and walls, users can deter intruders while enjoying peace of mind. Regular maintenance, including battery checks and inspections, ensures optimal camera performance, addressing common issues through simple troubleshooting or professional support when needed.
“Uncover the power of security with our comprehensive guide to dummy dome cameras featuring blinking LED technology. This article, titled ‘Dummy Camera Bracket Installation Guide,’ offers an in-depth exploration of these versatile security solutions. From understanding their mechanics to choosing the ideal installation spots for optimal coverage, we’ve got you covered.
We’ll also delve into the advantages of LED blinking and provide a step-by-step installation process, ensuring your space is protected with efficiency and style.”
- Understanding Dummy Dome Cameras: A Comprehensive Overview
- Benefits of Using Blinking LED Dummy Camera Brackets
- Step-by-Step Guide to Installing Dummy Camera Brackets
- Choosing the Right Location for Optimal Security Coverage
- Maintenance and Troubleshooting Tips for Longevity
Understanding Dummy Dome Cameras: A Comprehensive Overview
Dummy dome cameras, often mistaken for real security devices, are an innovative and cost-effective solution for property owners seeking to enhance their home’s security. These realistic-looking cameras serve as a powerful deterrent against potential intruders, featuring a distinctive dome shape and blinking LED indicators. Beyond their aesthetic appeal, dummy cameras offer a straightforward installation process that can be easily guided by a Dummy Camera Bracket Installation Guide.
Understanding the components of these cameras is key to successful integration into any security system. The bracket plays a vital role in securing the camera, ensuring it remains firmly in place despite attempts at manipulation. With the help of this guide, homeowners can learn how to attach the camera securely, align it for optimal visibility, and even customize its positioning to suit their specific needs. This DIY approach not only saves costs but also empowers individuals to take control of their home security measures.
Benefits of Using Blinking LED Dummy Camera Brackets
Blinking LED dummy camera brackets offer a plethora of advantages for both home and business security systems. One of the key benefits is their deterrence value; the visible presence of these simulated cameras with intermittent LED flashes can effectively discourage potential intruders, as it conveys a strong surveillance message. This simple yet powerful tool can act as a deterrent without the need for costly and complex security infrastructure.
For DIY enthusiasts and those seeking an easy installation process, dummy camera bracket systems provide a straightforward solution. The Dummy Camera Bracket Installation Guide ensures that anyone can mount these brackets with ease, enhancing their property’s security in no time. This cost-effective approach allows homeowners and businesses to add an extra layer of protection without breaking the bank.
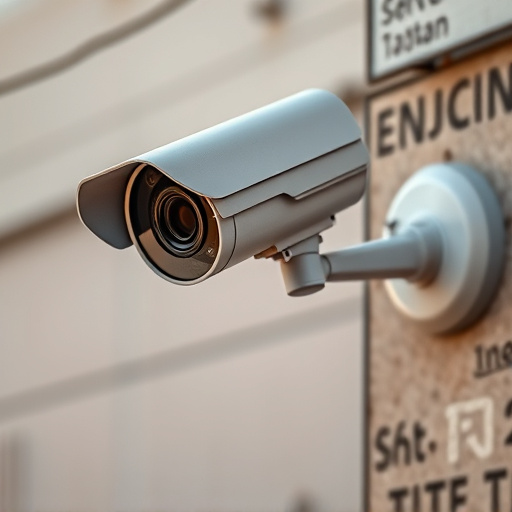
Step-by-Step Guide to Installing Dummy Camera Brackets
Installing a dummy camera bracket is a straightforward process that can significantly enhance your home security setup. Here’s a step-by-step guide to help you through the process:
1. Choose the Right Location: Select a spot where you want to mount the dummy camera. Ensure it provides a clear view of the area you wish to monitor and is easily visible to deter potential intruders. Consider factors like proximity to entry points, lighting, and any obstructions that might block the camera’s field of view.
2. Gather Your Tools: Before beginning, gather your installation tools, including screwdrivers (both flathead and Phillips), a level, measuring tape, and the dummy camera bracket. Double-check that you have all the necessary components to ensure a successful setup.
3. Mark the Mounting Points: Using the level, mark the points where you will attach the bracket. Ensure the surface is sturdy and capable of supporting the weight of the camera. Marking the spots accurately ensures precise mounting for optimal stability.
4. Drill Pilot Holes: Using a drill with the appropriate bit size, create pilot holes at the marked locations. Pilot holes serve as guides for your screws, preventing damage to the surface and ensuring secure attachments. Be careful not to drill too deeply.
5. Attach the Bracket: Align the dummy camera bracket with the pilot holes and secure it in place using the provided screws. Tighten the screws securely but be mindful not to over-tighten, as this might distort or damage the bracket or surface.
6. Mount the Camera: Once the bracket is firmly attached, carefully mount your dummy camera onto the bracket, ensuring it aligns with your desired field of view. Double-check that the camera is secure and level before proceeding.
Choosing the Right Location for Optimal Security Coverage
When setting up dummy dome cameras with blinking LEDs, selecting the ideal location is key to achieving comprehensive security coverage. Consider areas that offer clear lines of sight and avoid obstructed views to ensure optimal surveillance. The camera’s placement should be strategic, taking into account potential blind spots where criminals might hide. A detailed Dummy Camera Bracket Installation Guide can assist in determining the best angles and heights for maximum protection.
By following a comprehensive guide, users can secure their dummy cameras at strategic locations, such as entry points, windows, and perimeter walls, to create an effective security system. This process involves careful observation of the surrounding environment and understanding the camera’s field of view. With the right installation, these dummy dome cameras can act as powerful deterrents while providing peace of mind for homeowners and businesses alike.
Maintenance and Troubleshooting Tips for Longevity
Regular maintenance is key to ensuring your dummy dome cameras with blinking LEDs function optimally and last for years. Start by checking the camera’s battery levels regularly, as a dead battery can cause the LED to stop blinking. Replace the batteries according to the manufacturer’s recommendations. Next, inspect the camera’s physical condition, looking for signs of damage or tampering. A secure installation using a Dummy Camera Bracket (as outlined in our Installation Guide) is crucial; ensure all hardware is tight and secure to prevent vibrations that could cause internal components to shift.
Troubleshooting common issues can be straightforward. If the LED isn’t blinking, double-check power supply connections and battery health. Sometimes, resetting the camera by turning it off and on again can resolve minor glitches. Keep an eye out for unusual behavior like erratic blinking patterns; these may indicate sensor problems or interference from nearby devices. In such cases, consult your device’s user manual for troubleshooting steps or reach out to customer support for expert assistance.
Dummy dome cameras with blinking LED brackets offer an effective, cost-efficient security solution. By strategically installing these devices using our comprehensive guide on dummy camera bracket installation, you can enhance home or business security without breaking the bank. Remember, proper location selection and regular maintenance are key to maximizing their benefits, ensuring peace of mind in today’s digital era.