Dummy dome cameras with blinking LEDs offer a cost-effective, versatile, and easy-to-install security solution for residential and commercial properties. The accompanying Dummy Camera Bracket Installation Guide enables users to quickly mount these realistic-looking cameras outdoors or indoors, enhancing property security through visible presence. Preparation involves ensuring mounting surface stability, gathering tools, marking installation spots according to the guide, drilling pilot holes, securing the bracket with screws, and attaching the dummy camera for optimal deterrence of intruders. Regular cleaning of the camera lens and proper battery maintenance ensure optimal performance and effectiveness.
“Discover the power of dummy dome cameras with blinking LEDs—an innovative security solution. This comprehensive guide, ‘Dummy Camera Bracket Installation Guide,’ walks you through understanding these cameras’ unique benefits, preparing your space for installation, and mastering the step-by-step bracket process. Learn how to maintain optimal performance and ensure peace of mind. Enhance your home or business security with this practical, effective approach.”
- Understanding Dummy Dome Cameras and Their Benefits
- Preparing Your Space for Installation
- Step-by-Step Dummy Camera Bracket Installation Process
- Maintenance and Tips for Optimal Performance
Understanding Dummy Dome Cameras and Their Benefits
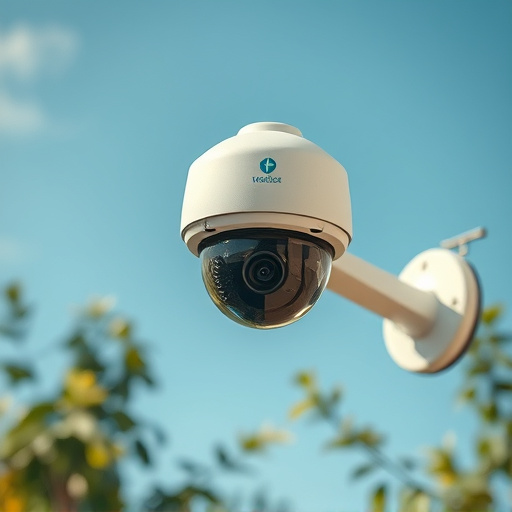
Dummy dome cameras with blinking LEDs offer a cost-effective security solution for both residential and commercial properties. These devices mimic real surveillance cameras, deterring potential intruders by signaling that your property is under constant observation. Unlike traditional cameras, dummy dome cameras require no wiring or complex installation processes, making them easy to set up almost anywhere. A Dummy Camera Bracket Installation Guide can help homeowners and business owners quickly mount these cameras on walls, ceilings, or other visible locations.
One of the key advantages of dummy dome cameras is their versatility. They blend seamlessly into various environments, from bustling city streets to quiet suburban neighborhoods. The blinking LEDs provide a realistic appearance, enhancing the camera’s deterrence effect. Moreover, these cameras are often equipped with durable weatherproof designs, ensuring they can withstand outdoor conditions. By combining functionality and aesthetics, dummy dome cameras represent a practical choice for those seeking an affordable way to enhance security without significant investment or technical expertise.
Preparing Your Space for Installation
Preparing your space for dummy dome camera installation with a blinking LED is a straightforward process that involves careful planning and some basic tools. Begin by ensuring the area where you’ll mount the camera offers sturdy support for the bracket, typically walls or ceilings. Check for any structural integrity issues to guarantee a secure fit. Next, gather your tools: a level, drill, driver bits, measuring tape, and the dummy camera bracket. Use the level to ensure the surface is straight, then mark the installation spots according to the provided guide for optimal placement. Drilling pilot holes at these marks will prevent damage to surfaces during full mounting.
Once your space is ready, follow the dummy camera bracket installation guide carefully. Align the bracket with the marked spots and secure it using the appropriate hardware. Ensure all screws are tightly fastened for stability. With a secure bracket in place, attach the dummy camera, ensuring its LED blinks realistically to deter potential intruders.
Step-by-Step Dummy Camera Bracket Installation Process
Setting up a dummy dome camera with a blinking LED requires a straightforward installation process using the Dummy Camera Bracket. Here’s your step-by-step guide:
1. Preparation: Begin by ensuring you have all necessary components, including the dummy camera bracket, mounting hardware, and your dummy dome camera with a blinking LED. Gather tools like a screwdriver or hex key for assembly.
2. Mounting Location: Identify the ideal location for your dummy camera. This could be on an exterior wall, fence post, or any sturdy surface that offers a clear view of the area you want to monitor. Clean the mounting surface and ensure it’s free from debris or obstructions.
Maintenance and Tips for Optimal Performance
Proper maintenance is key to ensuring your dummy dome cameras with blinking LEDs function optimally and remain effective deterrents. Regular cleaning of the camera lens using a soft, dry cloth is essential, as it removes dust or grime that could obstruct the view. A quick wipe-down after inclement weather or high pollution days can significantly enhance image quality.
When installing your dummy camera bracket, follow the included Dummy Camera Bracket Installation Guide meticulously. Secure the bracket firmly to ensure the camera’s stability and prevent unwanted movements, which could skew images or trigger false alarms. Additionally, keep the camera’s battery well-maintained; replace it regularly as recommended by the manufacturer to avoid unexpected failures, especially in crucial security situations.
Dummy dome cameras with blinking LEDs offer a cost-effective security solution, and with the right installation guide (like our step-by-step Dummy Camera Bracket Installation Process), you can easily prepare your space and maintain optimal performance. By understanding these cameras’ benefits and following simple maintenance tips, you’ll enjoy peace of mind knowing your area is under watchful eye.