Dummy Camera Bracket Installation Guide: Mounting and Troubleshooting Tips
The Dummy Camera Bracket Installation Guide provides a step-by-step process for setting up a dummy c…….
The Dummy Camera Bracket Installation Guide provides a step-by-step process for setting up a dummy camera system with a versatile bracket, ensuring secure and precise mounting for various photography and videography angles. The guide includes tool suggestions, installation location tips, marking instructions, and troubleshooting advice for common issues like a red blinking light, emphasizing the importance of compatibility and secure connections.
“Dive into the world of dummy camera bracket installation with our comprehensive guide. This step-by-step manual is tailored for both beginners and seasoned professionals, offering insights into securing your device with precision. From understanding the basic setup of a dummy camera bracket to identifying and troubleshooting common issues like the red blinking light, this installation guide equips you with the knowledge to achieve a seamless integration. Equip yourself with the right tools and follow our clear instructions for a successful install.”
- Understanding the Dummy Camera Bracket: A Basic Setup
- Preparation and Tools Required for Installation
- Step-by-Step Guide to Securely Mounting the Dummy Camera
- Troubleshooting Common Issues with Red Blinking Light
Understanding the Dummy Camera Bracket: A Basic Setup
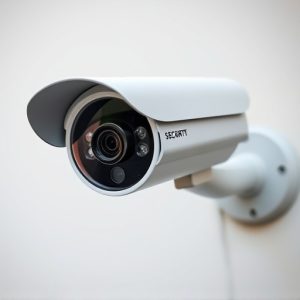
The Dummy Camera Bracket is a simple yet essential component in any photography setup, especially for those using a dummy camera or simulating a camera presence. This bracket serves as a mounting point for your camera, allowing precise positioning and aiming. It’s a fundamental part of the Dummy Camera Bracket Installation Guide, ensuring stability and control during photoshoots or video recordings.
With its basic design, the bracket typically includes adjustable screws or clamps to secure your camera in place. This versatility enables users to mimic various camera angles and perspectives, creating more dynamic and versatile content. Whether you’re a professional photographer, videographer, or enthusiast, understanding how to properly install and utilize this bracket can greatly enhance your creative process.
Preparation and Tools Required for Installation
When preparing for a dummy camera red blinking light installation, having the right tools and understanding basic steps are key to a successful setup. This Dummy Camera Bracket Installation Guide will walk you through the essentials. Start by gathering essential tools including a screwdriver (preferably Phillips), wire cutters, and a dummy camera bracket compatible with your chosen mounting surface. Ensure your work area is well-lit for precision. Before beginning, double-check that all components are present and in good condition.
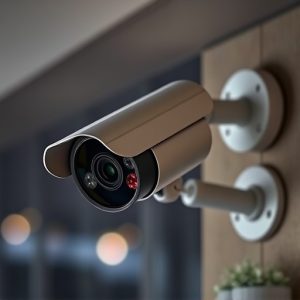
Next, locate the ideal installation spot, whether on a wall or ceiling, ensuring it aligns with your security or decorative vision. Mark the mounting holes accurately using a pencil. Using the screwdriver, carefully screw in the bracket, securing it firmly while confirming its stability. Once the bracket is in place, connect the dummy camera and light, following manufacturer instructions for proper wiring and placement.
Step-by-Step Guide to Securely Mounting the Dummy Camera
To secure your dummy camera in place, follow this straightforward Dummy Camera Bracket Installation Guide. Begin by selecting a suitable location for your camera mockup—choose a spot that offers a clear view and aligns with your desired field of vision. Next, gather your tools: a dummy camera (preferably one that matches the size and shape of your actual equipment), a bracket designed specifically for your camera model, and a set of secure mounting screws. Ensure your workspace is level to prevent any post-installation adjustments.
Attach the bracket to the desired surface using the provided hardware, ensuring it’s securely fastened. Align the dummy camera with the bracket’s designated slots and attach it firmly, following the manufacturer’s instructions for optimal placement. Finally, fasten the mounting screws from behind, securing the camera in place while ensuring a steady and stable connection.
Troubleshooting Common Issues with Red Blinking Light
If you’re encountering a red blinking light on your dummy camera bracket installation, don’t panic. This issue is common and often indicates a simple fix. First, check the power supply – ensure the device is plugged in securely and the cable is undamaged. In many cases, a simple reset of the device by unplugging it for 30 seconds can resolve the problem.
Additionally, verify the compatibility of your camera with the bracket. Some brackets are designed for specific camera models or types, and using an incompatible one could cause issues. Refer to your dummy camera bracket installation guide for detailed troubleshooting steps and ensure you’re using the correct settings for your device.
The dummy camera bracket installation process, as outlined in this guide, offers a straightforward solution for creating a realistic security setup. By following the step-by-step instructions and troubleshooting tips, you can efficiently mount your dummy camera with its distinctive red blinking light. This simple yet effective addition will enhance any home or business’s exterior appearance, deterring potential intruders while adding a touch of peace of mind. With these steps as your Dummy Camera Bracket Installation Guide, you’re now equipped to transform your space into a more secure environment.