Before installing a dummy camera bracket, clear mounting area debris and ensure surface cleanliness for optimal adhesion (refer guide). Select weather-resistant, realistic brackets matching environment style for effective deterrence. Secure bracket using recommended hardware like screws or adhesive for stability. Test setup with dummy camera, adjusting position for maximum field of view. Confirm security system's realism to deter intruders cost-effectively via Dummy Camera Bracket Installation Guide.
“Enhance your home or business security with our comprehensive guide on installing exterior dummy camera brackets. This step-by-step instruction covers preparing your outdoor space, selecting the ideal bracket for your needs, and securely mounting the fake CCTV camera. From wall or pole attachment to final adjustments, learn how to install a dummy camera bracket effectively. Discover tips and tricks to ensure optimal protection without breaking the bank.”
- Prepare Your Exterior Space for Mounting
- Choose the Right Dummy Camera Bracket
- Attach the Bracket to the Wall or Pole
- Securely Position the Fake CCTV Camera
- Testing and Final Adjustments
Prepare Your Exterior Space for Mounting
Before installing your dummy camera bracket, it’s crucial to prepare your exterior space. Clear the area around where you plan to mount the bracket, ensuring there are no obstructions like trees, fences, or other structures that might interfere with the camera’s field of view. Remove any debris or loose items that could damage the bracket during installation.
In terms of physical preparation, make sure the surface where you’ll attach the bracket is clean, dry, and suitable for mounting. For metal surfaces, consider using a primer to ensure better adhesion. Follow the manufacturer’s instructions for specific cleaning and preparation requirements detailed in your Dummy Camera Bracket Installation Guide.
Choose the Right Dummy Camera Bracket
When setting up an exterior CCTV system, selecting the appropriate dummy camera bracket is a critical first step in your Dummy Camera Bracket Installation Guide. The right bracket ensures your fake camera looks realistic and serves its intended purpose of deterring potential thieves. Look for brackets designed specifically for outdoor use, as these are typically made from weather-resistant materials like metal or high-quality plastic. Consider the size and style that best match your environment; some brackets mimic the look of real security cameras while others are more abstract designs.
Matching the bracket to your surroundings is key, but don’t forget to consider accessibility for future maintenance. Ensure there’s enough space around the bracket for easy cleaning or adjustments. Additionally, opt for a bracket with secure mounting options like screws or nails that can withstand outdoor elements and potential physical stress. This stability is crucial for maintaining the integrity of your CCTV setup and maximizing its deterrent effect.
Attach the Bracket to the Wall or Pole
To begin the dummy camera bracket installation process, carefully align and secure the bracket to your desired wall or pole. This crucial step ensures a stable platform for your fake CCTV camera, maintaining its integrity throughout the installation. Utilise the provided hardware, such as screws and anchors, to fasten the bracket firmly in place, ensuring it is level and secure.
Remember, the Dummy Camera Bracket Installation Guide recommends testing the stability of the bracket before proceeding with the rest of the setup. Once attached, double-check that all components are securely fastened, allowing you to move on to the next phase: attaching your fake CCTV camera for a convincing security system display.
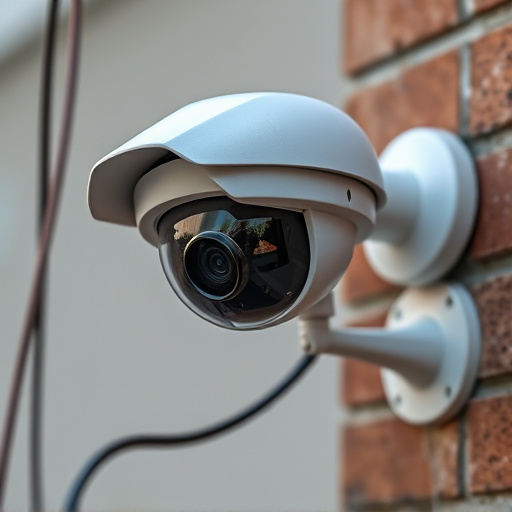
Securely Position the Fake CCTV Camera
When securely positioning your fake CCTV camera, it’s crucial to follow a precise installation guide tailored for dummy camera bracket systems. Begin by ensuring the mounting surface is clean and free from debris, allowing for a solid attachment. The bracket should be aligned with the intended direction of view, providing optimal coverage. Use the provided hardware, such as screws or adhesive, as recommended by the manufacturer.
For optimal security, fix the bracket firmly in place, considering factors like wall strength and weight distribution. Properly installed, your dummy camera will serve as a powerful deterrent without compromising aesthetics. This strategic placement enhances the overall safety of your property, creating the appearance of enhanced surveillance.
Testing and Final Adjustments
After completing the dummy camera bracket installation, it’s crucial to test the setup before finalizing any adjustments. Start by ensuring the bracket is securely attached to the desired mounting surface and that all bolts are tightly fastened. Then, carefully place your dummy camera into the bracket, making sure it fits snugly. Test the camera’s field of view by adjusting its angle and position until you achieve the optimal coverage for your security needs.
Once satisfied with the placement and alignment, perform a final check around the bracket and camera to ensure nothing has shifted or become loose during installation. This step is vital in ensuring the dummy CCTV’s effectiveness as a deterrent. Remember, a Dummy Camera Bracket Installation Guide can be an invaluable resource for getting these initial settings just right, enhancing your home security without breaking the bank.
Mounting an exterior dummy camera bracket is a straightforward process that can significantly enhance your home or business security. By following this step-by-step guide, from preparing your exterior space to final adjustments, you’ve now equipped yourself with the knowledge to install a dummy CCTV camera effectively. Remember, while these cameras serve as deterrents, proper physical security measures should always be your first line of defense. Enjoy peace of mind knowing that potential intruders will think twice before attempting any malicious activities on your property.